Services offload their computationally expensive tasks into workers. Think of software that converts video from its original format to a web standard. This kind of job can be considered long-running, even for state-of-the-art hardware. The web app can’t convert the video, it doesn’t have access to the software and, even if it did, we’d have little control over what ends up on our servers. The service used by the app could convert the video, but it would take valuable processing time shifting though millions of requests.
To maintain responsiveness, for each video the service issues a task, which takes the form of a message going into a distributed queue. Eventually, workers receive the message and perform the actual conversion. In the app, depending on the scenario, you might receive a message reading that your video is being processed.
A Simple Example
This example features a simple web crawler service that, given an initial URL and total number of links to follow, will scan each page and count the number of links. Nothing too fancy, as it focuses on the process, not on the functionality.
Here is the diagram of the system as a whole.

The UI is browser-based. It uses Backbone.JS for structure and Bootstrap for design simplicity. Next, a REST service is implemented using Flask, a Python micro-framework. Once it has analyzed the request, the service sends a task message to a RabbitMQ broker. The Celery-based workers listen to the broker for tasks.
Let’s start with the most interesting component, the worker that processes the web pages to count the number of links.
The Celery-Based Worker
Celery is a popular distributed task-queue written in Python. It uses brokers as a delivery mechanism that decouples the task producer from the task consumer, namely the worker. It can use multiple types of brokers to send and receive tasks. However, for the purpose of this example, it will use RabbitMQ, which is explained in the next section.
Two Python packages are required on the worker: Celery and Beautifulsoup4. You can use pip to install both of them:
pip install celery
pip install beautifulsoup4
Up next is the algorithm used by the worker to crawl the webpages:
STEP 1: Add the initial URL to a stack.
STEP 2: Pop a URL out of the URL stack.
STEP 3: Fetch the web page from the specified URL.
STEP 4: Find all of the links on the page.
STEP 5: Save the number of links on the page.
STEP 6: Push the links on the page to the URL stack.
STEP 7: If the stack is not empty and the maximum number of links has not yet been processed, go back to STEP 2.
Python lists are used for the URL stack, BeautifulSoup4 is used to fetch the links on a web page and, for simplicity, results are saved to a local folder as JSON files. The code of the worker is below:
from celery import task
from bs4 import BeautifulSoup
from hashlib import md5
from urllib2 import urlopen, urlparse
import json

# The task uses a non-recursive depth first scan to crawl web pages and
# find the number of links on them
@task
def crawl(dataPath, url, maxLinks):
    crawlStack = [url]
    visited = []
    nrLinks = 0

    while (len(crawlStack) > 0) and (nrLinks < maxLinks):
        url = crawlStack.pop()
        visited.append(url)
        nrLinks += 1

        crawlId = md5(url).hexdigest()
        filePath = dataPath + crawlId + '.json'
        f = open(filePath, 'w+')

        crawlData = {'url': url}
        try:
            urlStream = urlopen(url)
            htmlDoc = urlStream.read()

            soup = BeautifulSoup(htmlDoc)

            links = soup.find_all('a')
            crawlData['links'] = len(links)
        except:
            links = None
            crawlData['links'] = -1

        f.write(json.dumps(crawlData))
        f.close()

        for link in links:
            try:
                urlPieces = urlparse.urlparse(url)
                linkPieces = urlparse.urlparse(link['href'])
                if len(linkPieces[1]) == 0:
                    newUrl = urlPieces[0] + '://' + urlPieces[1] \
                             + link['href']
                else:
                    newUrl = link['href']
            except:
                continue
            else:
                try:
                    visited.index(newUrl)
                except ValueError:
                    crawlStack.append(newUrl)
RabbitMQ Broker
RabbitMQ is a messaging system based on the AMQP standard. You first need to install RabbitMQ on your development machine. Installation instructions are available on the RabbitMQ website for both Debian and Redhat based distros.
After installation and before moving on to the REST service, RabbitMQ needs to be configured with the username, password, permissions and vhost that allow Celery to connect to it.
The required configuration directives can be found in the archive provided with this tutorial, in src/celeryconfig.py.
You can configure RabbitMQ using its own command line tool as shown below:
rabbitmqctl add_user celeryuser celery
rabbitmqctl add_vhost celeryvhost
rabbitmqctl set_permissions -p celeryvhost celeryuser ".*" ".*" ".*"
Before diving into the service code, you need to start the Celery worker daemon because the service will send tasks to a running Celery worker through RabbitMQ. You can do so by running the running the celeryd & command in the src folder in the archive provided with this tutorial or in the folder you have chosen to store celeryconfig.py and the worker code.
REST Service
The service uses the Flask micro-framework. It acts as a simple back-end wrapper for sending the task to a running worker by using the Celery client interface. You can install it using pip:
pip install flask
It exposes a REST interface consisting in the following operations:
- GET / – download the browser interface
- GET /crawls – list all the Crawl resources
- GET /crawls/{id} – fetch a Crawl resource’s content
- POST /crawls + JSON-Payload(Crawl resource) – create a Crawl resource
The Crawl resource contains the URL to start crawling from and the maximum number of links to crawl. E.g. {“url”: “http://www.google.ro”, “maxLinks”: 40}
Let’s translate this into a Flask application:
The service uses the Flask micro-framework. It acts as a simple back-end wrapper for sending the task to a running worker by using the Celery client interface. You can install it using pip:
from flask import Flask, request, send_from_directory
from werkzeug.wrappers import Response
from hashlib import md5
import os
import glob
import json
from tasks import crawl
app = Flask(__name__)

# Downloads the client code
@app.route('/')
def index():
    return send_from_directory('../web', 'index.html')

@app.route('/css/<path:filename>')
def sendCss(filename):
    return send_from_directory('../web/css', filename)

@app.route('/js/<path:filename>')
def sendJs(filename):
    return send_from_directory('../web/js', filename)

# Fetches the locally crawls
@app.route('/crawls', methods=['GET'])
def listCrawls():
    dataPath = '../data/*'
    responsePayload = []
    for dirPath in glob.glob(dataPath):
        f = open(dirPath + '/crawl', 'r')
        crawl = json.loads(f.read())
        crawl['id'] = os.path.basename(dirPath)
        responsePayload.append(crawl)

    return Response(json.dumps(responsePayload),
                    mimetype='application/json')

# Fetches a crawl by id
@app.route('/crawls/<string:id>', methods=['GET'])
def getCrawl(id):
    dataPath = '../data/' + id + '/'
    if not os.path.exists(dataPath):
        return Response(json.dumps({'error':'id is invalid'}),
                        status=404, mimetype='application/json')
    responsePayload = {}
    responsePayload['id'] = id
    responsePayload['crawls'] = []

    for filePath in glob.glob(os.path.join(dataPath, '*.json')):

        f = open(filePath, 'r')
        try:
            crawlResults = json.loads(f.read())
            if len(crawlResults['url']) > 75:
                crawlResults['url'] = crawlResults['url'][:75] + '...'
            responsePayload['crawls'].append(crawlResults)
        except:
            continue
        f.close()

    return Response(json.dumps(responsePayload),
                    mimetype='application/json')

# Creates a crawl
@app.route('/crawls', methods=['POST'])
def startCrawl():
    url = str(request.json['url'])
    maxLinks = int(request.json['maxLinks'])
    crawlId = md5(url + str(maxLinks)).hexdigest()
    dataPath = '../data/' + crawlId + '/'
    if not os.path.exists(dataPath):
        os.makedirs(dataPath)
    f = open(dataPath + 'crawl', 'w+')
    f.write(json.dumps({'url': url, 'maxLinks': maxLinks}))
    f.close()
    # Calls the "crawl" task
    crawl.delay(dataPath, url, maxLinks)
    return Response(json.dumps({'id': crawlId,
                                'message':
                                    'Task sent to celery worker: '
                                    + url}),
                    mimetype='application/json', status=202)

if __name__ == '__main__':
    app.run(host='0.0.0.0', debug=True)
To start the service, simply run the script through the Python interpreter:
python flask-server.py
Browser UI
Moving on to the Browser UI. This code is not as easy to digest. So, if you’re lacking a front-end experience, you can stop at the REST service and test it using PostMan, cURL or any other tool you see fit.
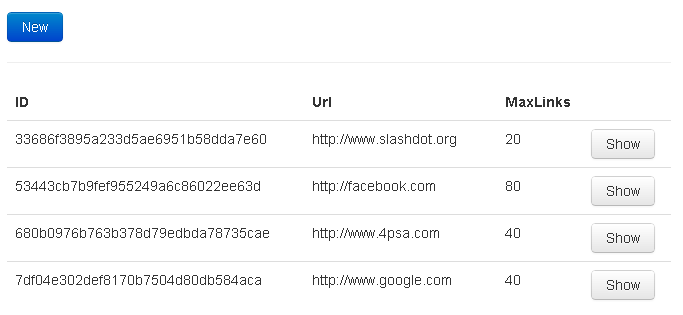
The UI is a simple single page app with three views: a list all the crawl resources, an add-screen for crawl resources and a screen for viewing a crawl resource’s results. A print-screen of the crawl resource listing can be seen below.
You can download the archive with all of the source for this example here.
What’s Next?
An interesting challenge would be to call a Celery task from Node.js or to write a task in a language other than Python. The solution is no walk in the park, but you will see this in a future article. Until then, have fun coding! We hope workers will fill in the performance gap in your new apps. 🙂
5 Comments
You can post comments in this post.
P G 12 years ago
The source archive does not have the template files etc., could you please upload it?
Thanks!
icham 12 years ago
hi,
the archive doesn’t contain the project file.
Could you post the link with the source?
LAIRR 11 years ago
Great example! A treasure trove of info right here
Anand Sampat 11 years ago
Where are the source files? I didn’t see them in the archive.
Shilpa 10 years ago
Nice Article. Truly helps understanding and implementing Celery
Leave a comment