For quite a while here at 4PSA we’ve been playing with 3D printing. Why? Because it’s cool and because there are a lot of applications for 3D printing, even in the cloud. We don’t claim to be 3D printing experts, but we took a power user (read engineering) approach to 3D printing which may be interesting to some of you. So we decided to share some stuff with you in a series of articles dedicated to 3D printing.
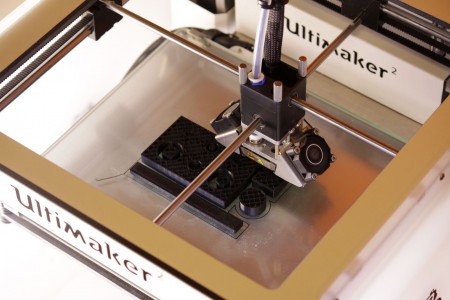
In today’s article, we want to answer a pretty interesting question – just what level of precision can you expect from a FDM printer? Fused deposition modeling is the most popular and accessible printing technology. The market is already full of printers and even kits you can use to build your own printer that cost as little as a few hundred bucks. For the test, we used one of the best printers available – Ultimaker 2. And yes, Ultimaker 2 may be worth more than a few hundreds, but it’s still an affordable piece of engineering.
The price difference is mostly tied to build quality, which eventually affects precision. Ultimaker promises 20 micron layer resolution (0.02mm), but there are some catches. This refers to the vertical resolution, which is given by the smallest step of the stepper motor which moves the table up and down (the Ultimaker’s print head only moves parallel to the ground on a horizontal plane, while the table is moved down progressively as printing advances). The nozzle width is 0.4mm, which at the moment of writing is the smallest width available. This means that, if you were to print a single line of plastic material on the printing bed, it would be around 0.4mm wide.
Printer Precision Testing Procedure
We designed some models in Sketchup and we wanted to check the difference in dimensions between the designed body and the actual printed body.
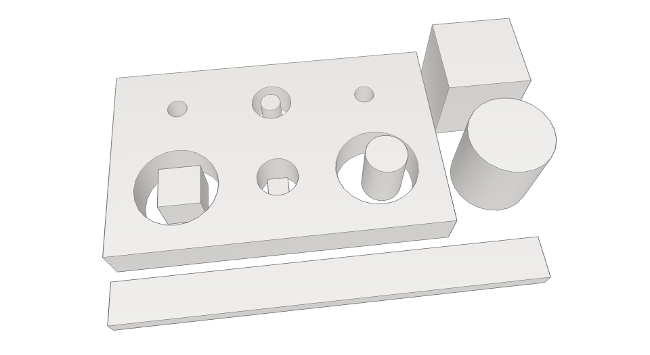
For this article, we didn’t use complicated shapes:
-
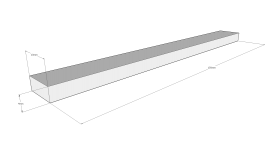

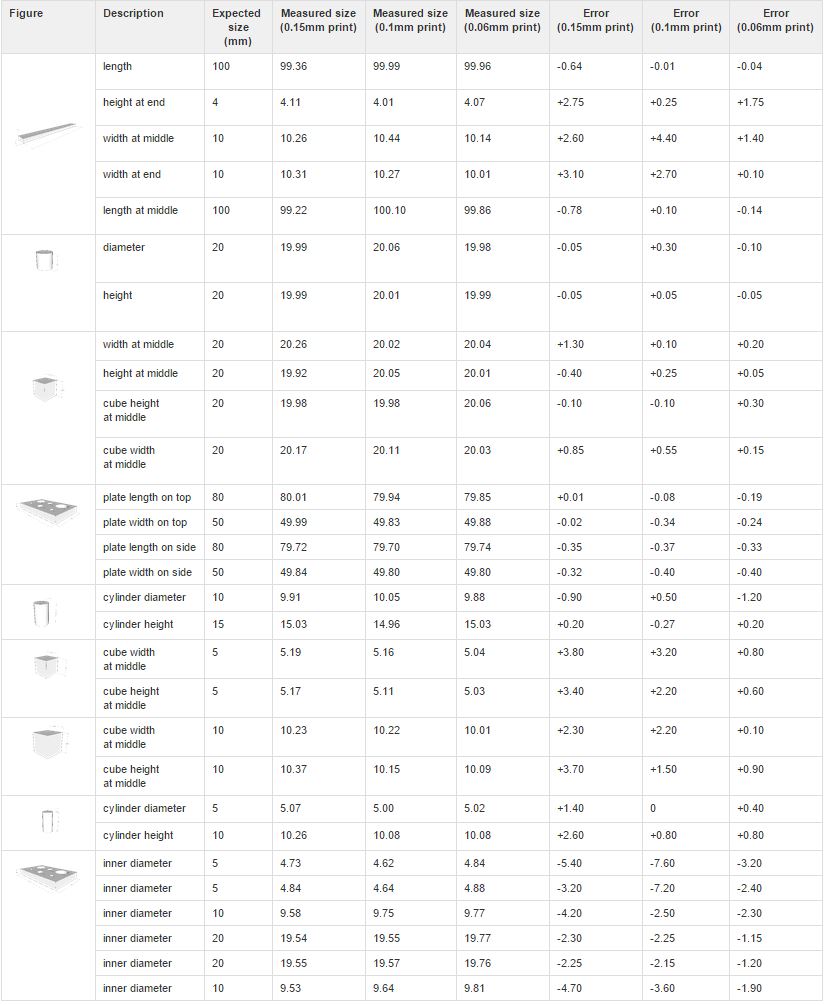
- Bar (A): length 100mm, width 10mm, height 4mm
-
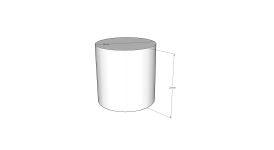
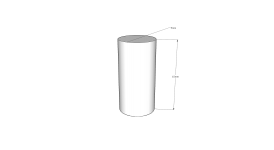
- Cylinder (B): diameter 20mm, height 20mm
-
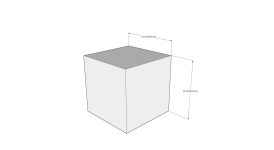
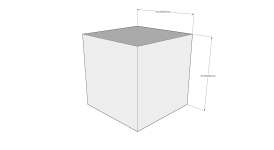
- Cube (C): edge 20mm
-
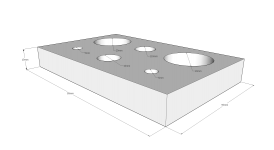
- Plate (D): length 80mm, width 50mm, height 10 mm with 6 holes (5,10 and 20mm diameter)
-
- Cylinder (E): diameter 10mm, height 15mm
-
- Cube (F): edge 5mm
-
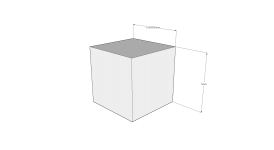
- Cube (G): edge 10mm
-
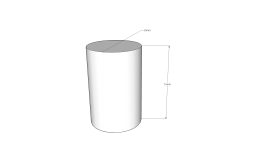
- Cylinder (H): diameter 5mm, height 10mm
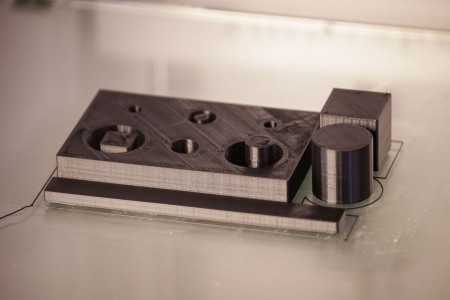
The bodies were arranged in the following layout to minimize printing head travel time:
We did three separate prints with the following resolutions: 0.15mm, 0.1mm, 0.06mm using the official black Ultimaker ABS filament.
Slicing was done with Cura 14.09 using the Ultimaker 2 profile. The following parameters were used:
- Fill ratio 20% – provides a good balance between mechanical restriction and ABS contraction when the part is cooled. If you want mechanical resistance, this will not be enough.
- No brim or raft
- No support structures.
- Shell thickness: 0.8mm
- Retraction was enabled.
- Bottom/top thickness: 0.6mm
- Extruder temperature was set to 260 degrees Celsius, while the bed temperature was set to 90 degrees Celsius.
For the 0.15mm print, we used paper glue to make the model stick to the printing bed. On the 0.1mm print, the paper glue almost worked, all items were fine, except one corner of the plate which decided to warpnoticeably.
For the 0.06mm print, we needed to use something stronger: old ABS pieces dissolved in acetone resulted in a strong solution for keeping the parts glued to the printing bed.
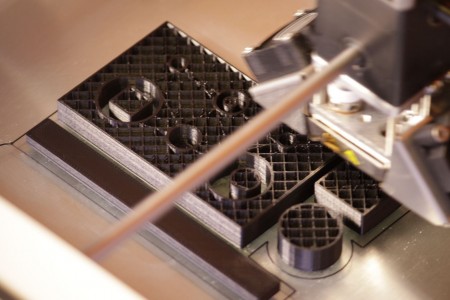
3D Printing Process
Unfortunately, like with any FDM printer, the printing process was quite slow. The printing process on 0.15mm took almost 4 hours, on 0.1mm almost 6 hours, and on 0.06mm more than 9 hours.
Another problem is that plastic melts, which means that a lot of fumes and odors will invade the room. Most people don’t like the smell and and even if you get used with it, it’s not very healthy. What’s more, one of the ingredients of ABS is believed to be carcinogen for humans.
Disclaimer – this happens while the filament melts, otherwise the plastic is considered hazard free.
As you can see in the pictures below, the model is not filled with plastic during printing. Furthermore, the surface of the printed objects is not 100% smooth, but it’s quite acceptable.
For all prints, we used around 27g of plastic. The cost is very reasonable, less than 1.5 EUR / print for materials.
3D Printing Test Results
Once the parts were printed and cooled down, we took a digital caliper with +/- 0.1mm error margin and we measured them all. We listed the results in the table below.
So, What Can We Expect?
Generally speaking, the error percentages are proportional to the chosen resolution: by selecting the highest precision, you will get the lowest errors. Printing at 0.06mm leads to the best results; however, it’s important to carefully consider if such high precision is required. Most of the time, quality improvements are negligible. However, when going from 0.15mm to 0.06mm, printing time doubles, if not more. The graphic below shows this more intuitively – as you can see, the yellow line is closer to Ox axis.
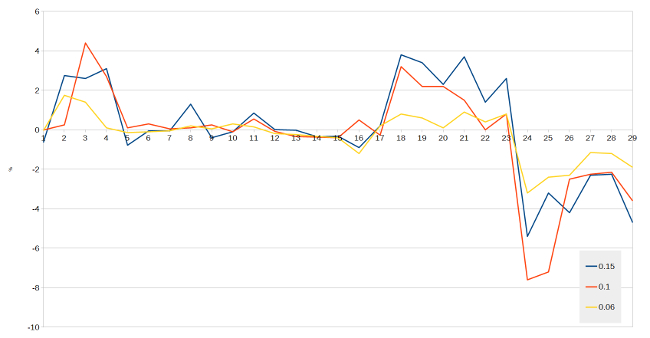
Another interesting fact is the measurements for the 0.1mm print don’t fall exactly between the 0.15mm and the 0.06mm print. We suspect a variance in the room temperature, because the 0.1mm print was done in a much colder room (around 14 degrees C). With FDM, it’s best to avoid temperature changes – because of the high thermal latency of the extruder head and printer bed, the parts will contract faster than expected during printing. Ultimaker 2 tries to makes things a little bit better, that’s why the printer is closed on two sides. However, there is still plenty of thermal transfer.
The infill rate will also affect this precision. In this test we used only 20%, but if you want something more durable you should go above 40%, which will affect precision.
Is 3D printing ready for the home ? Depends on how brave you are 🙂
- During these tests, the extruder stopped printing two times without any apparent reason (fixed by removing and reinserting the material).
- The heated extruder and print plate are a safety risk, at least for kids.
- There’s a lot of manual work to do – it’s not like a paper printer.
- Surfaces of ABS prints have to be finished in order to achieve a professional look, similar to injected molding surfaces.
If you like playing (and you don’t have to be a geek for that), then you will love to get a 3D printer from Santa because:
- it allows prototyping of virtually any part, even quite large (eg: 20 x 20 x 20 cm). It’s true that printing models so large will require a lot of skill.
- printed parts can be quite resistant mechanically (depending on printer settings and material).
- materials are relatively cheap; the printer is not cheap yet, but it’s not that expensive either.
- you do not have to build all models yourself – there are great chances to find something you want on the Internet.
It’s definitely not a mature technology, but eventually it will get there. Playing with Ultimaker 2 was lots of fun! In fact, once you get yourself a 3D printer, you will get ideas for applications from place you can’t even imagine. Printing quality may not be perfect, but parts can actually be used in the real world – it’s not just prototyping. The slow speed seems to be the biggest problem so far, but it’s funny – you get a similar feeling when you wait for the cakes to bake into the oven 😉
Leave a comment